Page History
Install Git X-Modules from the Atlassian Marketplace.
Open your main working repository or create a new one.
Click on the “Git X-Modules” icon in the left menu.

Select the branch you would like to add external (“module”) files to, and click “Add module”
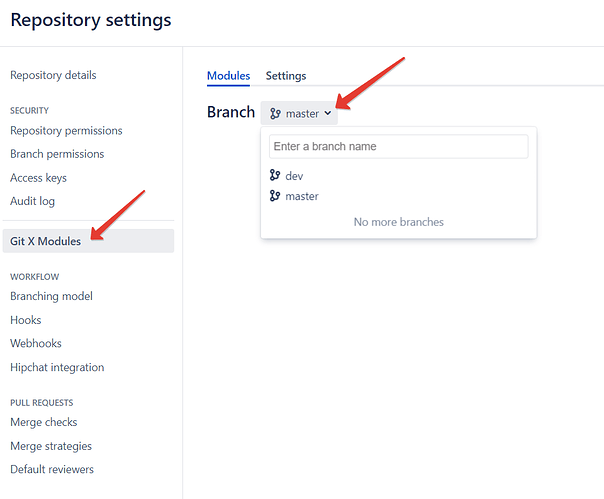
image960×794 37 KB
In the new window, select:
the repository fo add files from (“module”);
the branch in the module repository to add files from;
whether you would like to include module files read-only (“fetch only”) or to update external modules from time to time (“fetch and push”);
the directory to add module files to.
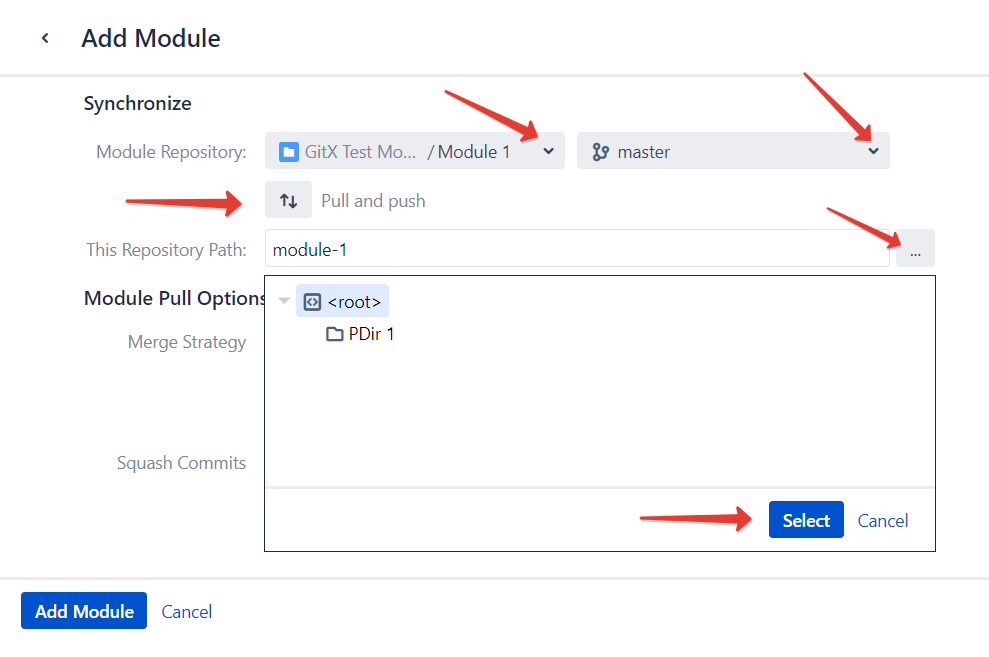
You may also pin your new module to a specific tag or commit
...
to the external repository.
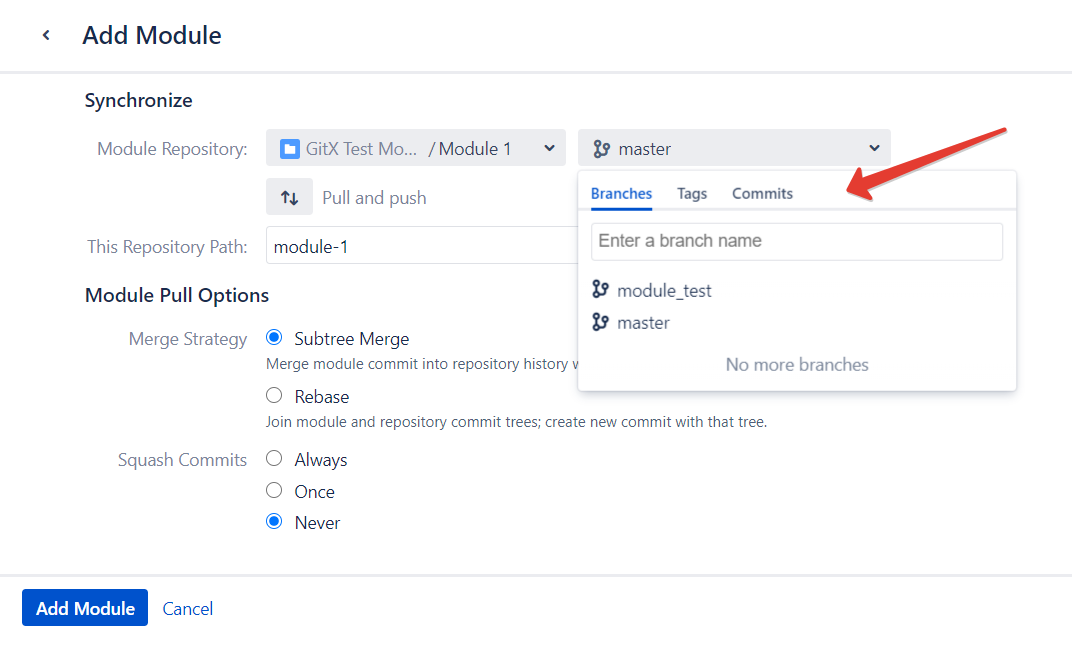
Select the merge strategy you would like to use (see more information here).
Click “Add module”. The new module will appear in the list. You may check and edit the module settings if needed.
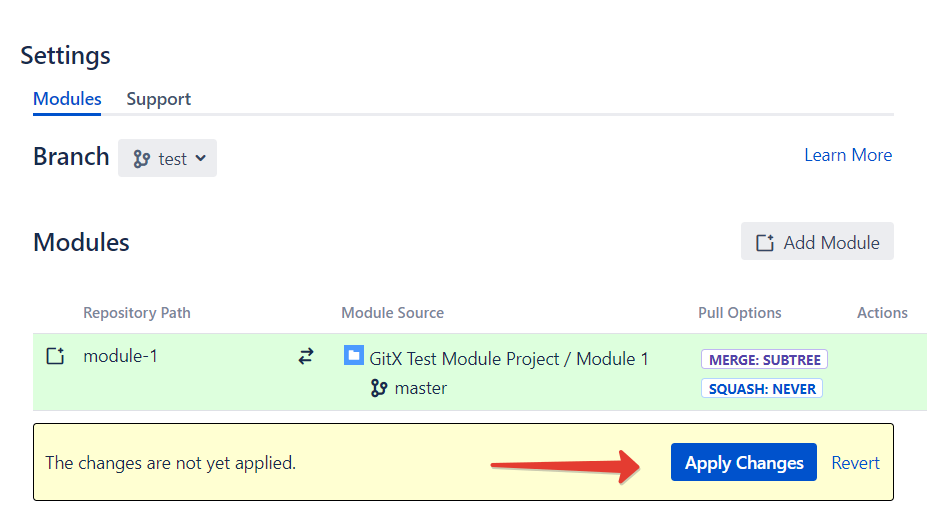
When you’re ready, click “Apply changes”. The files you’ve selected will be added to your repository.
Git X-Modules will automatically check the source (“module”) repository and fetch updates to these files, if any.To change your module settings, hover on the module in the list and click the “Edit” button.
To remove the module, hover on the module in the list and click the “Delete” button.

That’s all! Enjoy this smooth, safe, stress-free way to work with external sources right from your repository.
Overview
Content Tools