1. Set up the database
1.1 Download MySQL
Download MySQL Community Server 5.5.53. Download the executable file and launch, or if you have downloaded an archived version, unpack it and then launch the executable file.
1.2 Install MySQL
Run the executable file and proceed installation until the installation program asks you to chose a setup type:
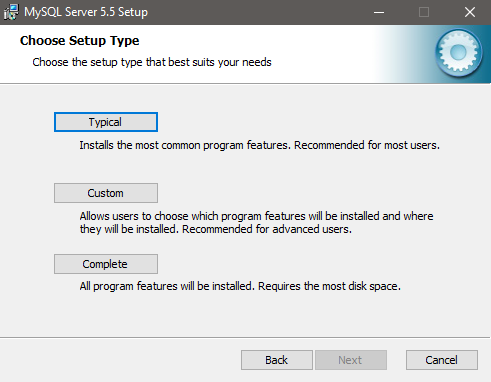
Press the “Typical” button and continue with the installation until you will see a window reporting successful installation:
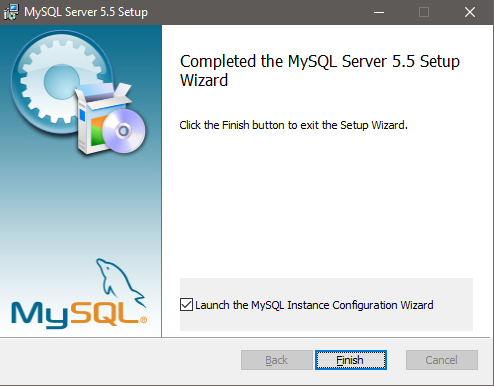
Make sure that the box “Launch the MySQL Instance Configuration Wizard” is checked and press “Finish”.
1.3 Configure MySQL
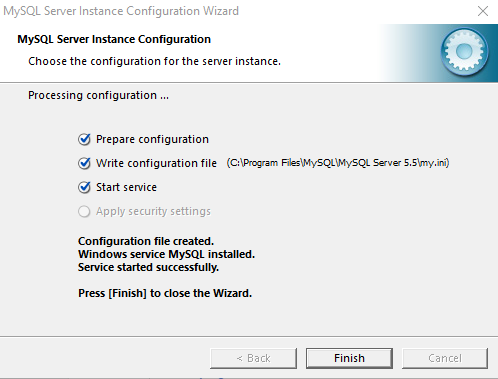
After pressing the “Finish” button, Configuration Wizard will pop up. Press the “Next” button:
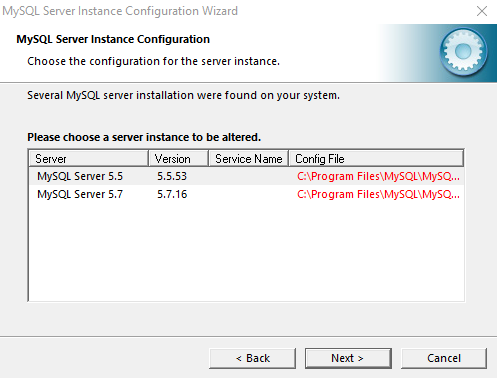
Chose the server you just installed and then the “Next” button:
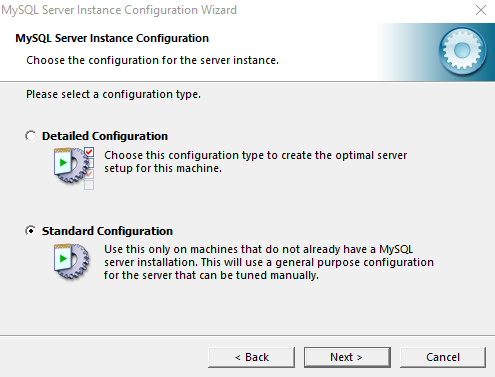
Chose “Standard Configuration” and then “Next” button yet again:
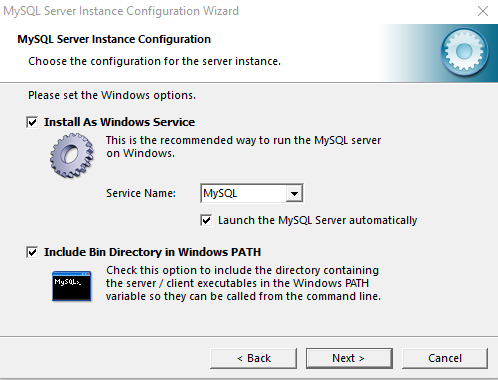
Make sure that you have checked the box “Include Bin Directory in Windows Path” at this step and then press the “Next” button.
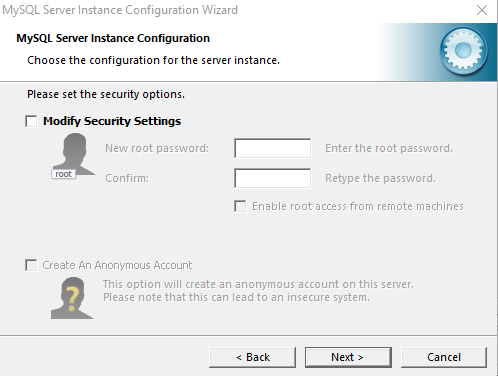
Uncheck “Modify Security Settings” box (Do not worry, the custom password will be set later) and proceed in the Configuration Wizard until you hit the “Finish” button.
1.4 Setup the database
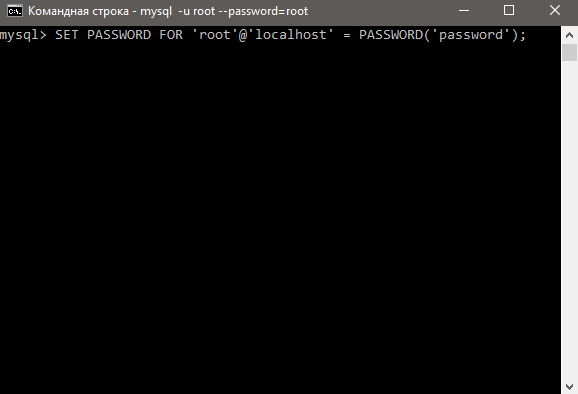
Run command line (cmd) and enter the line: mysql -u root –password=root
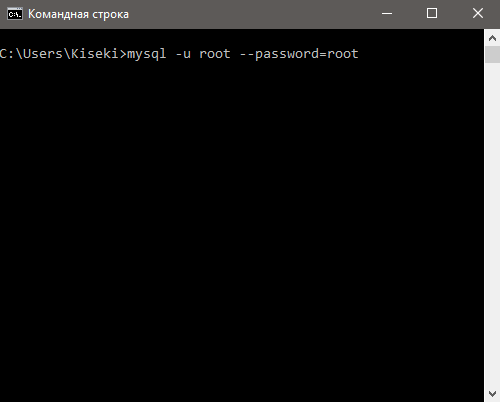
You will be connected to MySQL Monitor. To change the password write the following line:
$ SET PASSWORD FOR 'root'@'localhost' = PASSWORD('custompassword');
Where ‘custompassword’ is the password that you chose.
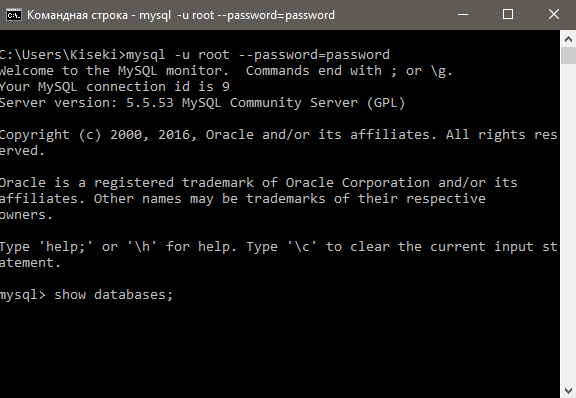
Enter the line:
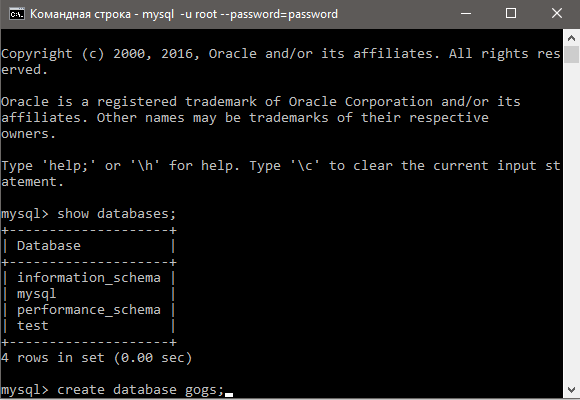
$ show databases;
(Make sure you have put semicolon(;) at the end of the line) to see the list of databases.
Create a database for Gogs with the line:
$ create database gogs;
To check if the database was created write the line
$ show databases
again.
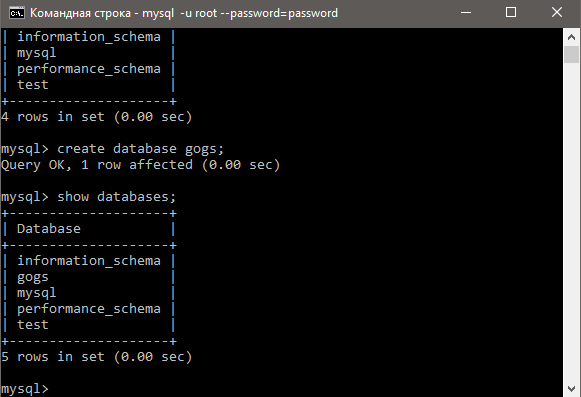
If “gogs” database is present in the list, you are good to go. Enter “exit” and close the cmd.
2. Set up Gogs
2.1 Download Gogs
Download Gogs and unpack into the its working directory.
2.2 Set Gogs up
Open the command prompt window and navigate to the directory where you have unpacked Gogs and run the following command:
gogs web
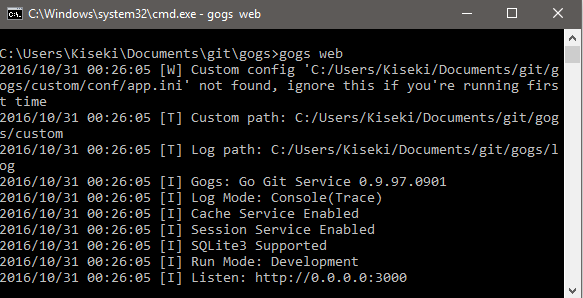
this will launch Gogs server, to proceed with the installation, enter the following web-address to address bar of your browser: 127.0.0.1:3000

If you have done everything right, a configuration page will show up:
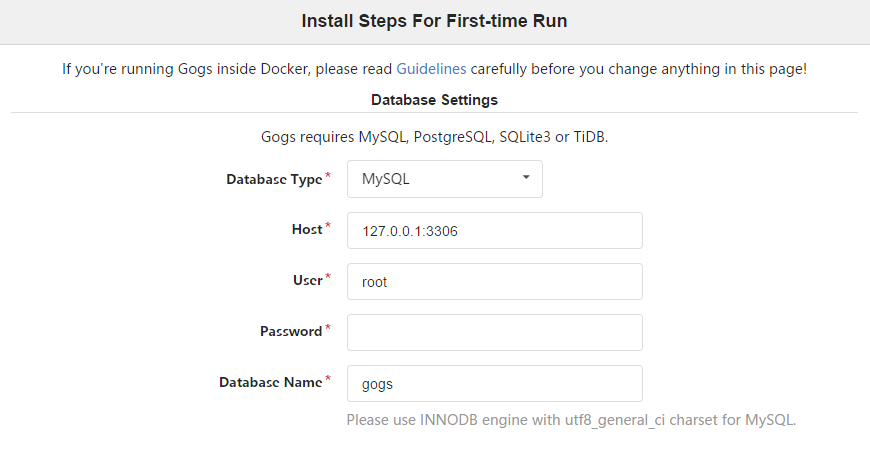
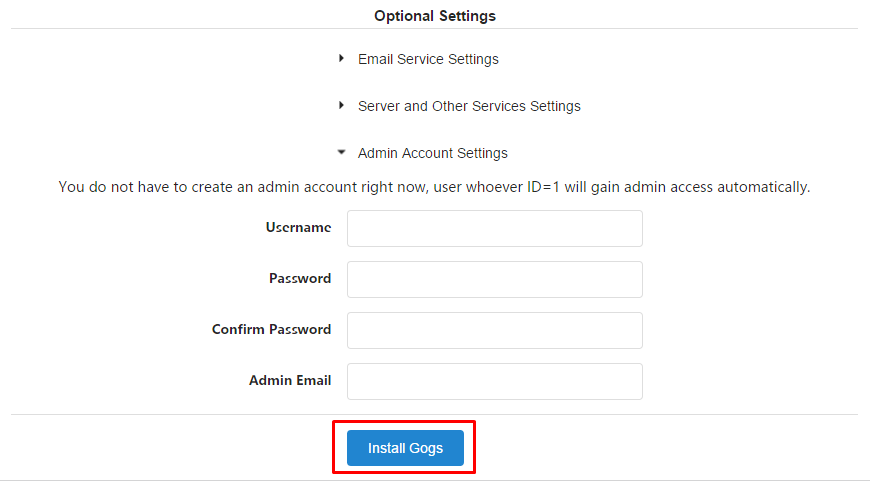
Write the password of your database in the “Password” field and feel free to configure the Gogs at your discretion, but if you do not mind default settings, then simply hit “Install Gogs” button.
2.3 Create a repository
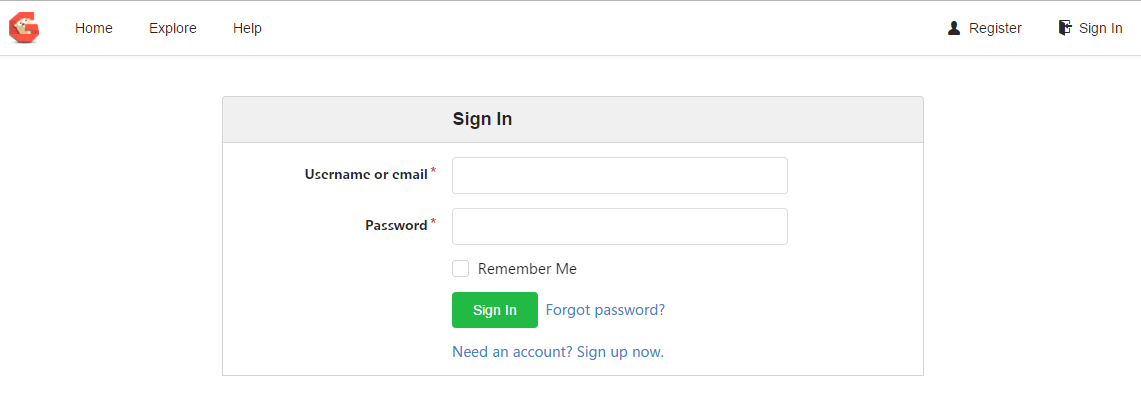
After pressing “Install Gogs” button you will be redirected to login page. If you have not entered administrator accounts data on the configuration page, simply register an account, it will be granted administrators attributes automatically.
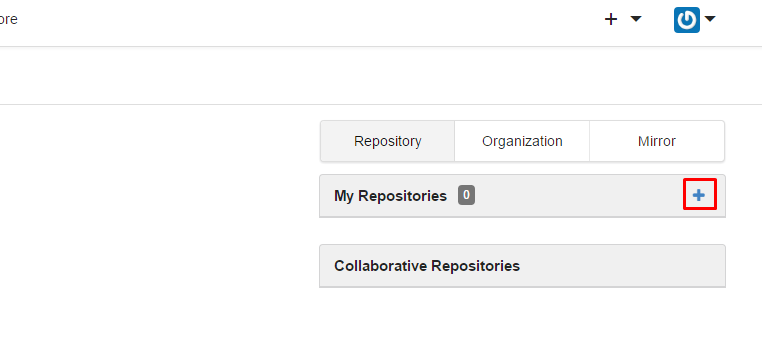
Next, hit the “Plus” button in “My Repositories” window:
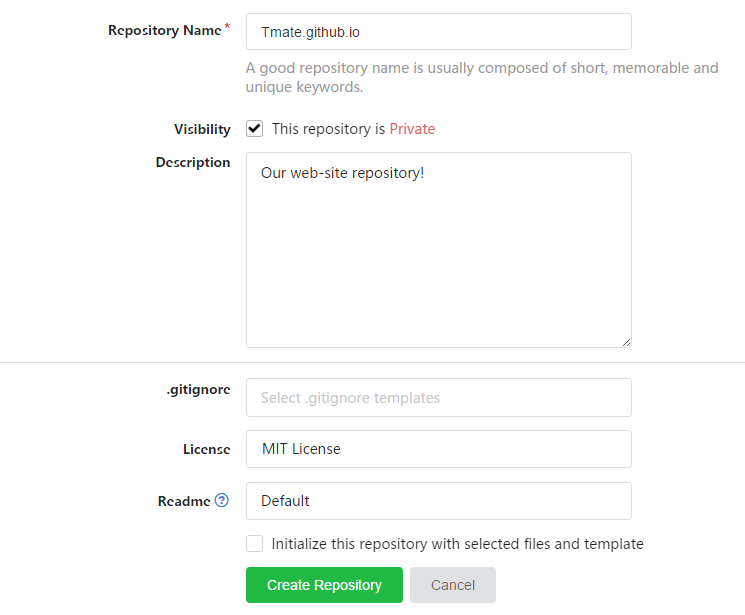
Here, enter the data of your new repository and hit “Create Repository” button.
3. Set up SubGit
3.1 Download SubGit
Download SubGit and unpack it into it’s working directory.
3.2 Set SubGit up
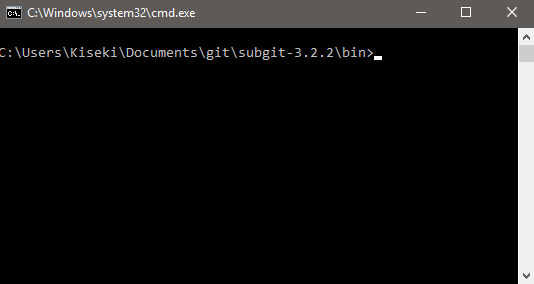
Open the command prompt window and navigate to the “bin” directory inside of the directory where you have unpacked SubGit:
And run the following command:
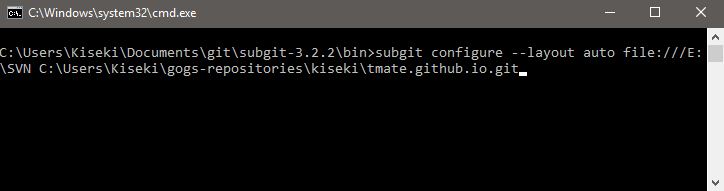
$ subgit-3.3.1/bin/subgit configure --layout auto SVN_URL REPOS.GIT
where SVN_URL is an url leading to svn repository and REPOS.GIT is a path leading to git repository, created with Gogs (By default Gogs repositories are locating at C:\Users\%username%\gogs-repositories\%gogsAccountname%).
Example:
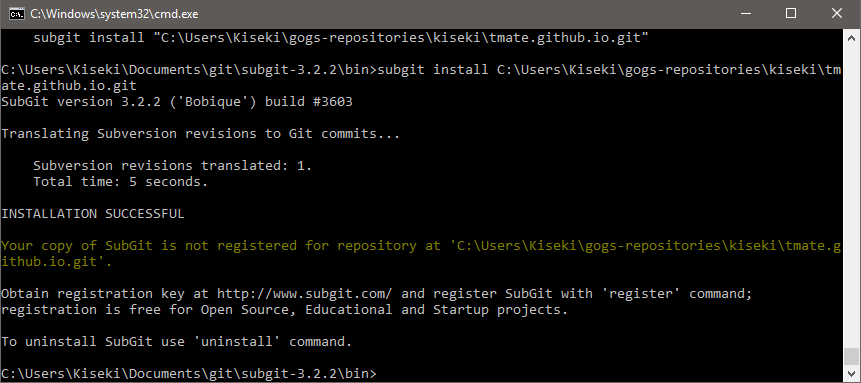
$ subgit configure --layout auto file:///E:\SVN C:\Users\Kiseki\gogs-repositories\kiseki\tmate.github.io.git
and then run the following command:
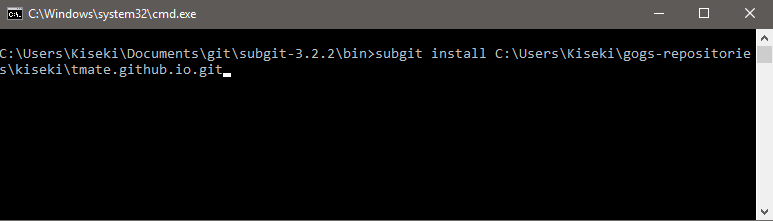
$ subgit-3.3.1/bin/subgit install REPOS.GIT
where REPOS.GIT is (Yet again) a path leading to git repository, created with Gogs.
Example:
$ subgit install C:\Users\Kiseki\gogs-repositories\kiseki\tmate.github.io.git
If application reports the successful installation, that means that subgit is now synchronized with your SVN and Gogs repositories.
Our congratulations on successful installation of Gogs :)