Page History
I. Install and authorize Git X-Modules
From the GitHub Marketplace
...
Login to your account at GitHub
...
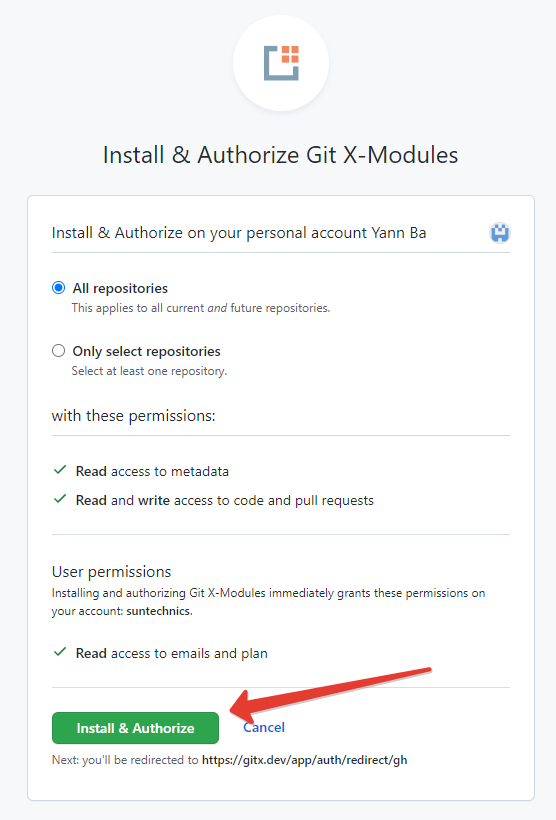
Complete the installation. You may choose, which repositories the app will be installed to.
...
You will be automatically redirected to the Git X-Modules login page. Click on “GitHub Cloud”
From the Git X-Modules website
...
Go to
...
In the Pricing and Setup section click on “Install it for free”
...
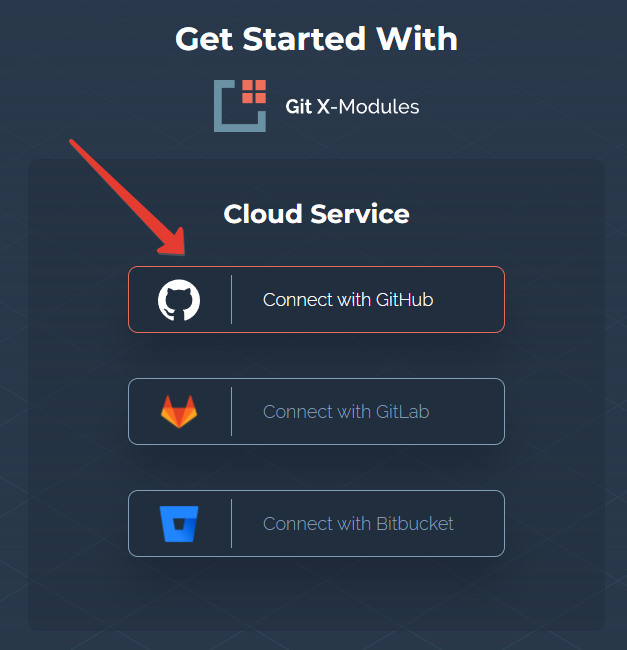
https://gitmodules.com and click on “Get Started”. Then click “Connect with GitHub”.

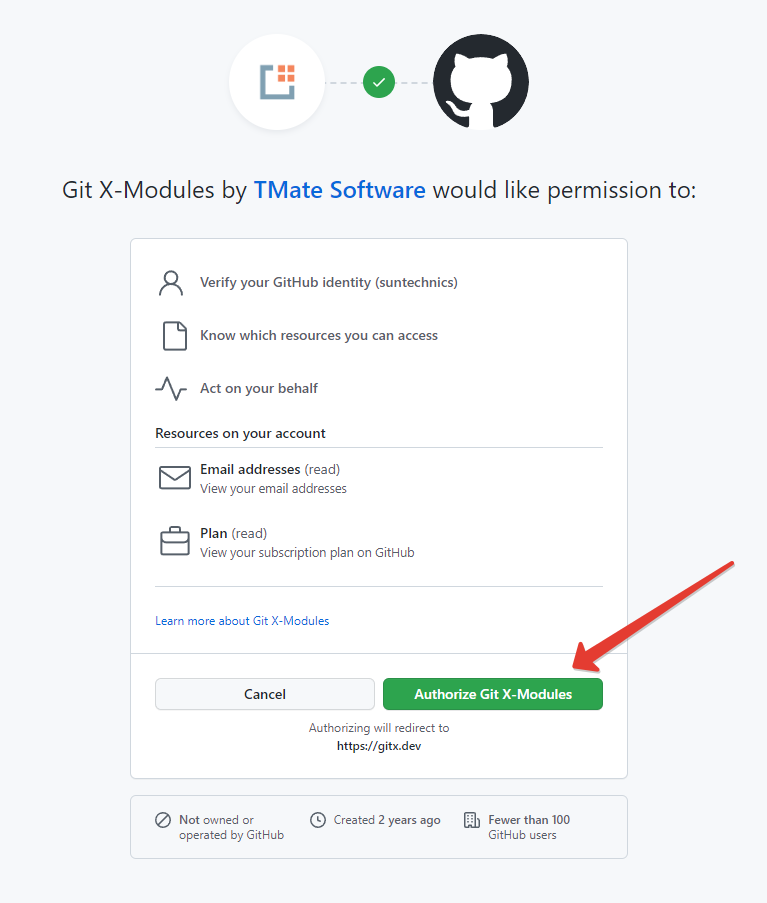
You will be redirected to the GitHub authorization page. Click “Authorize Git X-Modules”
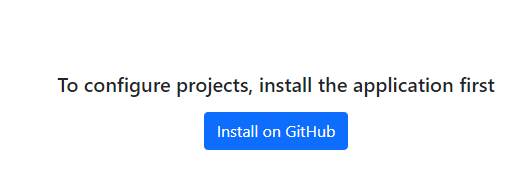
You will be redirected to the main page of the Git X-Modules Cloud service. But your repositories are not there yet. Click “Install on GitHub”.
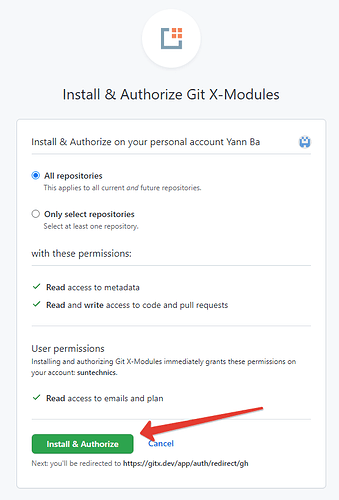
In the GitHub installation screen, click “Install and authorize”. You may choose, which repositories the app will be installed to. You will be redirected back to Git X-Modules after that.
| Note |
|---|
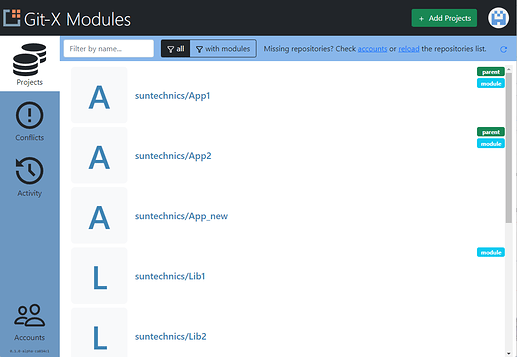
If you don’t see your repositories in Git X-Modules after installation - try reloading the page. |
II.
...
Add a module
- Select the parent repository (the one that you would like to add modules to) on the main page of the Git X-Modules app. Click to enter the module setup.

| Note |
|---|
To create a monorepo, first create an empty repository on GitHub, and then select it as a parent. The repository should contain a default branch. |
2. Select the branch to add a module to. Then click “Add module”
...
6. Optional: Specify the Root Path and the Exclude Paths to select, which parts of the module repository will be added to the parent repository.
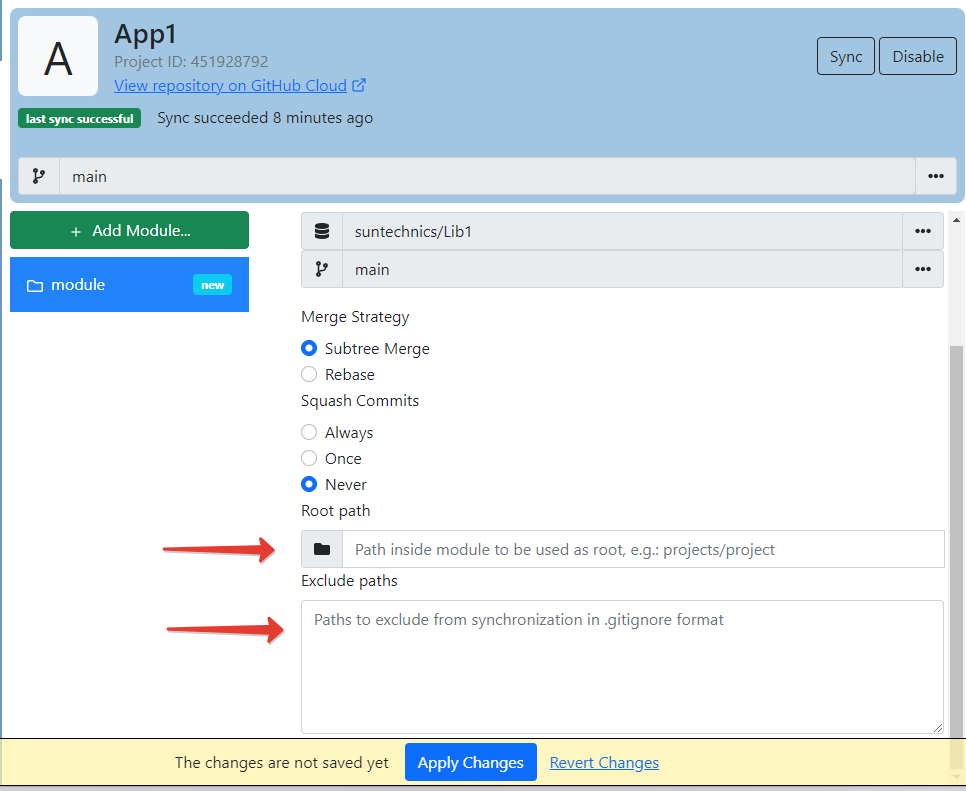
If you want to add only a certain directory, specify it in the Root Path field.
If you want to exclude certain files or file types, specify them in the Exlcude Paths fiels. Use the .gitignore syntax.
7. Click “Apply Changes”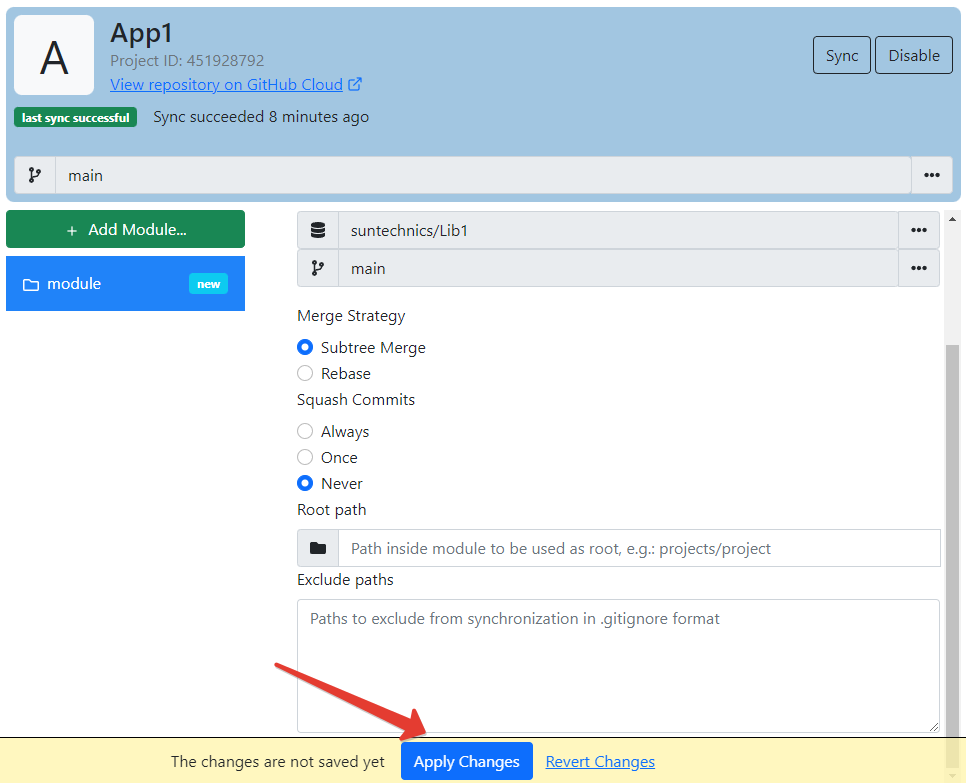
That is it! Your new module is created and synchronized. You may create several modules at once before applying changes. You may also change any settings at any time.
If anything goes wrong, or you need more information, or just would like to share some insight with us - please create a topic on our Support Forum. We would love to hear from you!
Overview
Content Tools